Introduction
Data validation is one of Excel’s most powerful tools for ensuring accuracy and consistency in spreadsheets. But did you know you can make it even smarter by linking validation rules to other cells? Whether you’re creating dependent dropdown lists, restricting entries based on conditions, or automating workflows, using data validation in Excel based on another cell unlocks next-level efficiency.
In this guide, you’ll learn:
- What data validation is and why it matters.
- Step-by-step methods to create dynamic validations tied to other cells.
- Pro tips to troubleshoot common issues.
By the end, you’ll be able to build spreadsheets that “think” for themselves—saving time and reducing errors.
What Is Data Validation in Excel?
Data validation controls what users can enter into a cell. Common uses include:
- Restricting entries to specific numbers, dates, or text.
- Creating dropdown lists for standardized inputs.
- Preventing duplicates or invalid formats.
But when you link data validation to another cell, you add layers of interactivity. For example:
- Show a dropdown of cities only if a user selects a specific country.
- Allow budget entries only if a project status is “Approved.”
Why Use Data Validation Based on Another Cell?
- Dynamic Workflows: Automatically update options based on user choices.
- Error Prevention: Eliminate mismatched or irrelevant data.
- User-Friendly Forms: Simplify data entry with context-aware dropdowns.
Step-by-Step Guide: How to Use Data Validation in Excel Based on Another Cell
1. Create a Basic Dependent Dropdown List
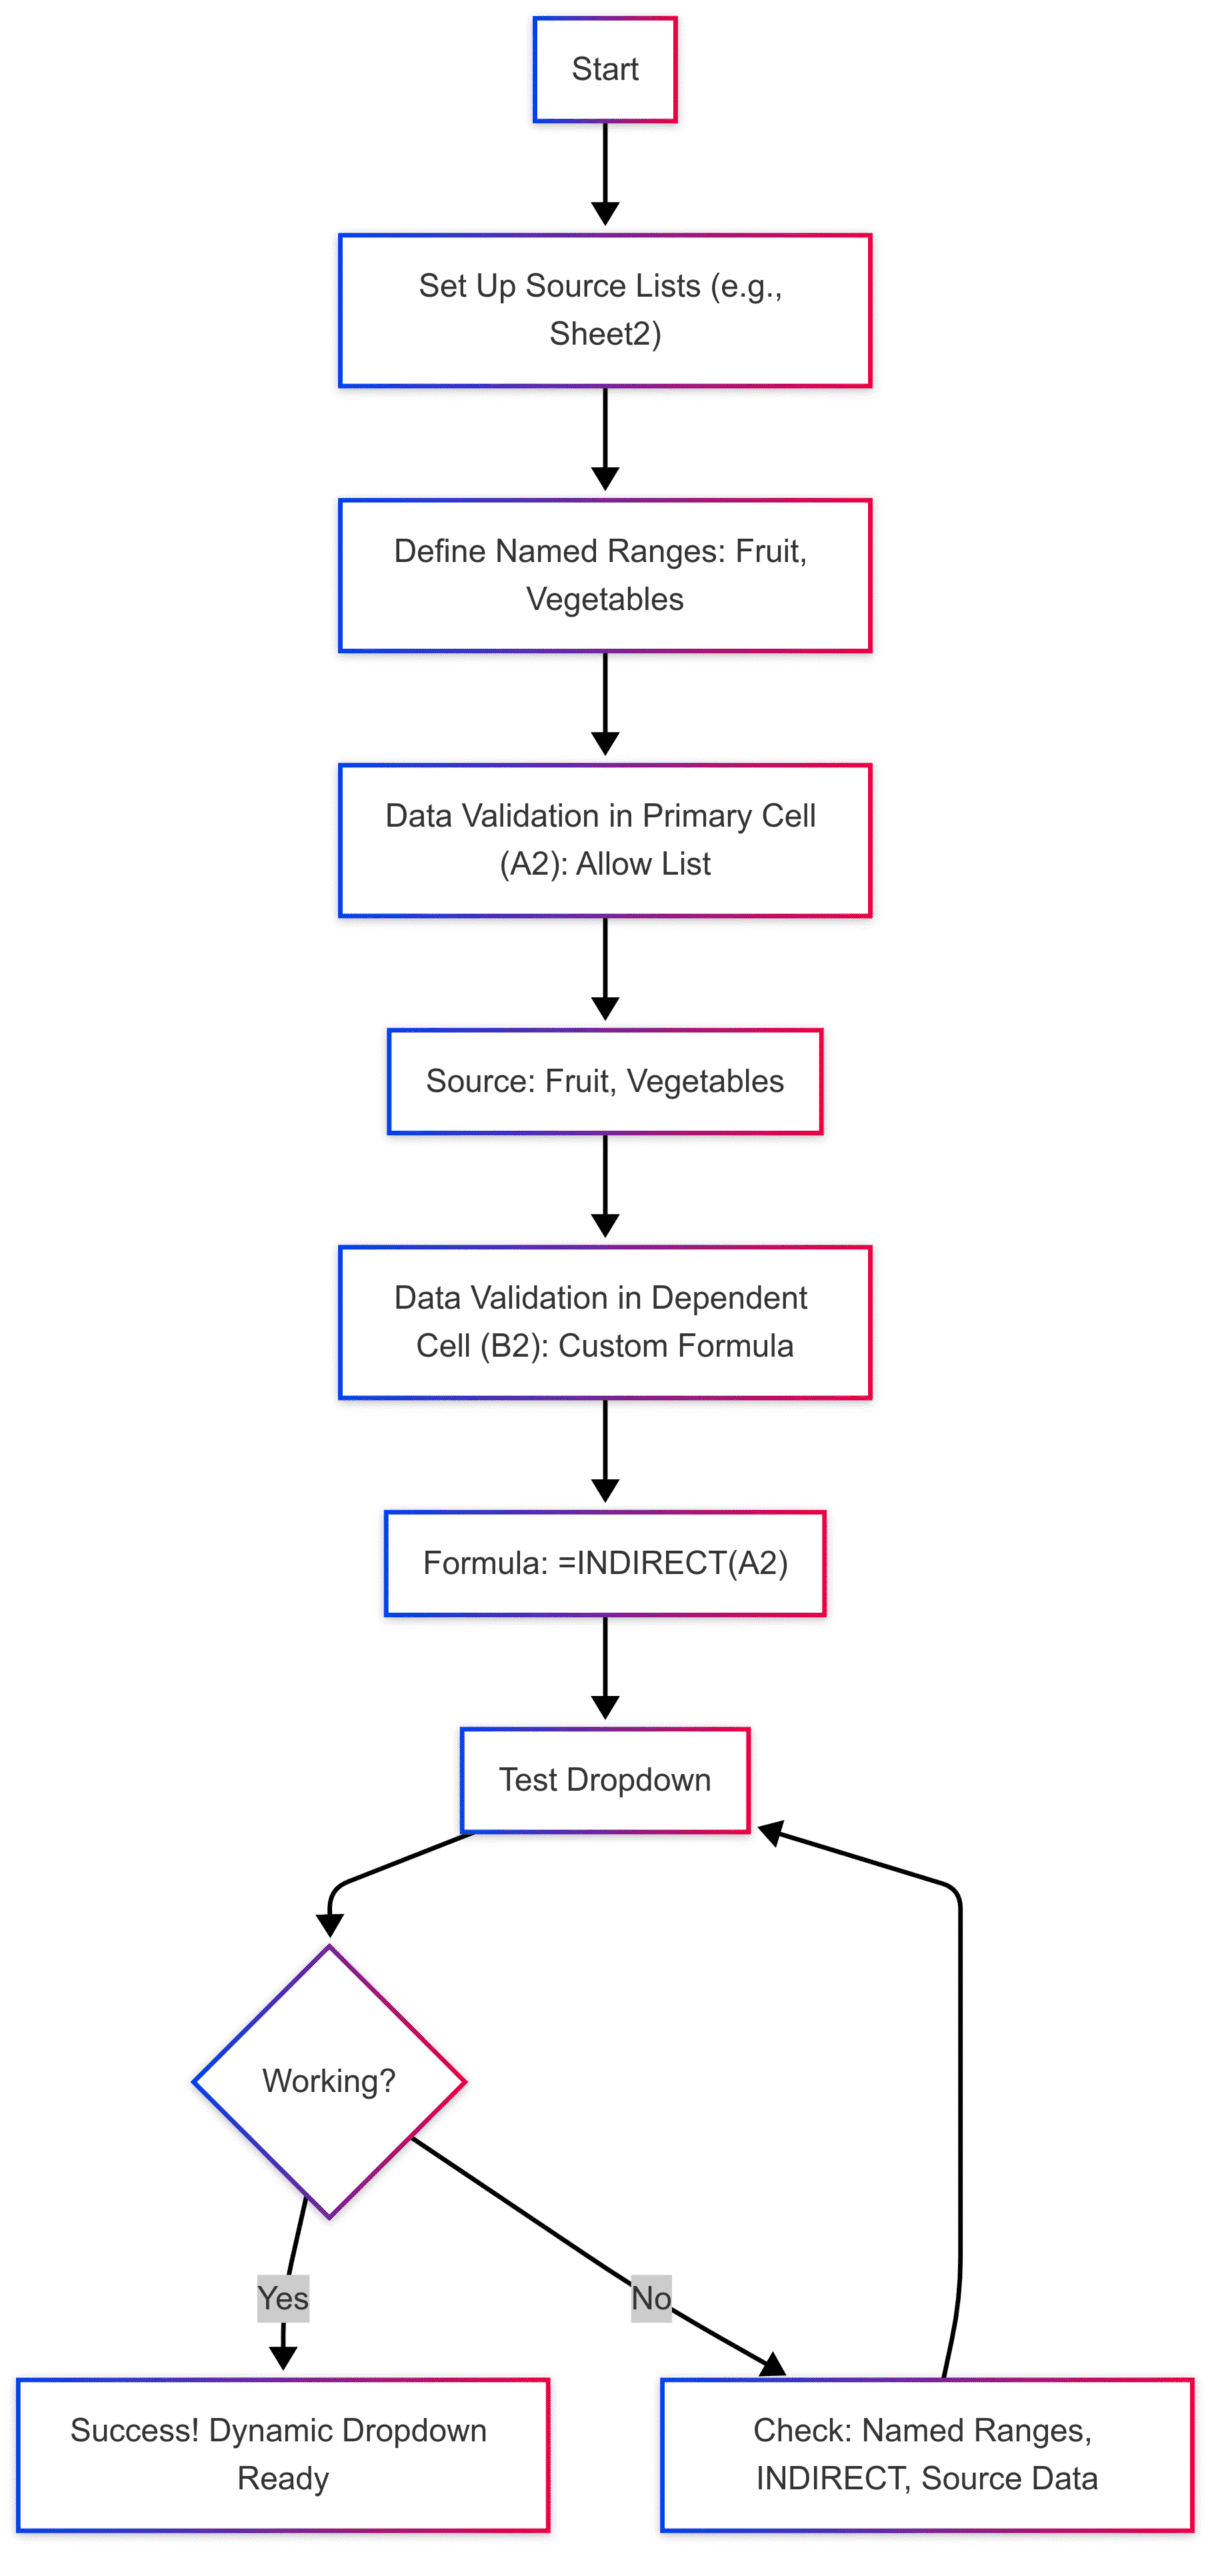
Scenario: You want a dropdown in Cell B2 that changes based on the value of Cell A2 (e.g., selecting “Fruit” in A2 shows “Apple, Banana” in B2).
Steps:
- Set Up Source Lists:
- In a separate sheet (e.g., Sheet2), list categories and subcategories:
- A1:
Fruit, B1:Apple,Banana - A2:
Vegetables, B2:Carrot,Broccoli
- A1:
- In a separate sheet (e.g., Sheet2), list categories and subcategories:
- Name the Ranges:
- Select B1:C1 → Go to Formulas > Define Name → Name:
Fruit. - Repeat for Vegetables: Name
Vegetables.
- Select B1:C1 → Go to Formulas > Define Name → Name:
- Apply Data Validation to Cell A2:
- Select A2 → Data > Data Validation > Allow: List → Source:
Fruit, Vegetables.
- Select A2 → Data > Data Validation > Allow: List → Source:
- Link Cell B2 to A2:
- Select B2 → Data Validation > List → Source:
=INDIRECT(A2).
- Select B2 → Data Validation > List → Source:
Result: When you select “Fruit” in A2, B2 will show Apple and Banana!
2. Restrict Inputs Based on Another Cell’s Value
Scenario: Allow a budget entry in Cell C5 only if Cell B5 is marked “Approved”.
Steps:
- Select C5 → Data > Data Validation.
- Under Allow, choose Custom.
- In the Formula field, enter:
=B5="Approved"
Set an error message: “Budget can only be entered for approved projects.”
Result: Users can’t enter a budget unless B5 says “Approved”.
3. Use Formulas for Advanced Validation
Example: Ensure the end date (Cell D10) is always after the start date (Cell C10).
- Select D10 → Data Validation > Custom.
- Enter formula:
=D10>C10
Customize error alerts for clarity.
Visual Guide: How Dependent Data Validation Works

Pro Tips for Flawless Data Validation
- Name Ranges for Easy Reference: Avoid errors by naming ranges (e.g.,
=INDIRECT(A2)works only if A2 matches a named range). - Combine with Conditional Formatting: Highlight invalid entries instantly.
- Test Thoroughly: Use dummy data to ensure rules fire correctly.
Troubleshooting Common Issues:
- Dropdown Not Appearing: Check named ranges and ensure no typos in the
INDIRECTformula. - #REF! Errors: Verify that source lists exist and named ranges are correctly defined.
- Circular References: Avoid formulas that reference the validated cell itself.
Conclusion
Learning how to use data validation in Excel based on another cell transforms static spreadsheets into interactive tools. From dynamic dropdowns to conditional inputs, these techniques ensure data integrity while simplifying user experience.
Ready to level up? Start by applying one of the examples above, and watch your Excel skills—and productivity—soar!
